RESTful API with OAuth2.0 using PHP
Representational state transfer API (RESTful API) is an interface that securely exchanges information from one computer system to another over the internet.
Rest API allows the programmer to receive the data from other programs using API such as GET POST. Also, rest API allows us to update and delete the records using PUT and DELETE API.
Why do we need a REST API?
REST API (Representational state transfer Application programming interface) The name indicates using REST API. It is used to communicate with another program over the internet using HTTP protocol.
Securing REST APIs with OAuth 2.0: A Guide to Authorizing and Accessing Protected APIs using Postman
Step 1: Install Laravel
To create the laravel project, we need to install the PHP and composer on the system. After the PHP and composer installation, we must create a laravel project. To create a laravel project, we need to use the below command.

Above command will create the Laravel-API project. Once the project is created, you can navigate to the Laravel-app folder and build the Rest API.
Step 2: Install OAuth2.0
In Laravel PHP, if we have to use OAuth2.0, we have to use the Laravel passport package, which is the official Laravel package. To install the laravel/passport package, run the command below.

Above command will install the necessary packages and dependencies required for the OAuth2.0 authentication.
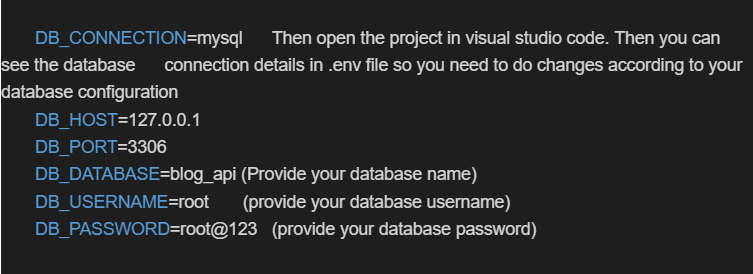
Then open the project in visual studio code and update the database connection details in the .env file according to your database credential.
Step 3: Configure OAuth2.0
Next, we need to set up the Passport configuration by running the following command:

The initial command will create the fundamental tables in your database, whereas the subsequent command will generate the keys and access tokens required for OAuth2.0 Authentication.
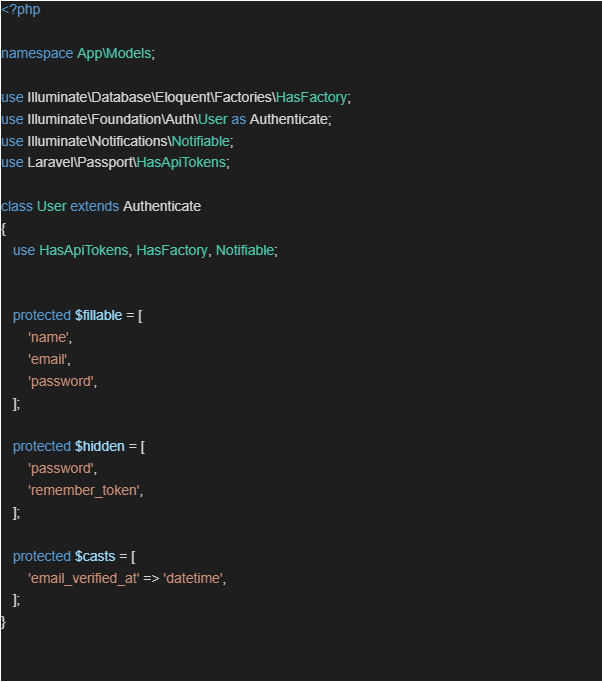
Add Passport’s HasApiTokens trait: Passport provides a HasApiTokens trait to add to your User model. This trait adds methods for creating and managing access tokens for the user.
Next, update the App\Providers\AuthServiceProvider as follows:

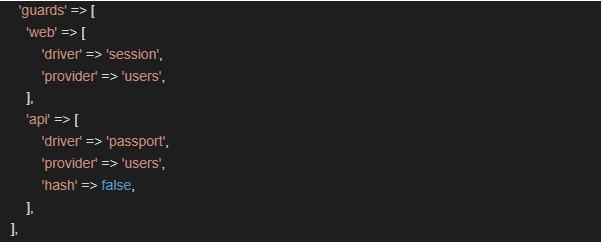
After that, we need to make changes in the configuration file config/auth.php. We need to add an authentication guard for API and set driver options as passports.
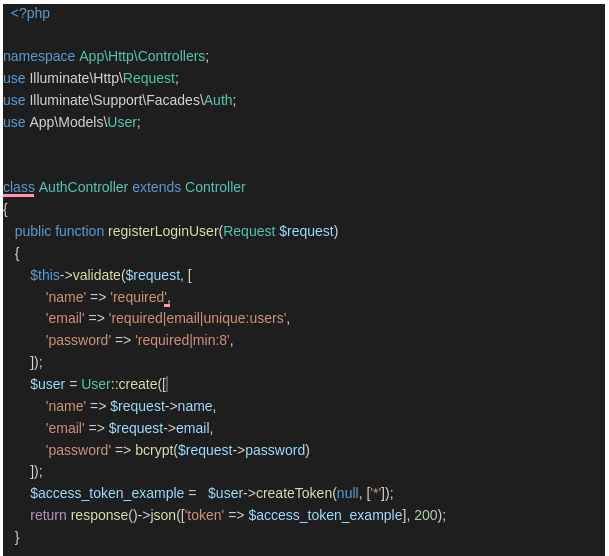
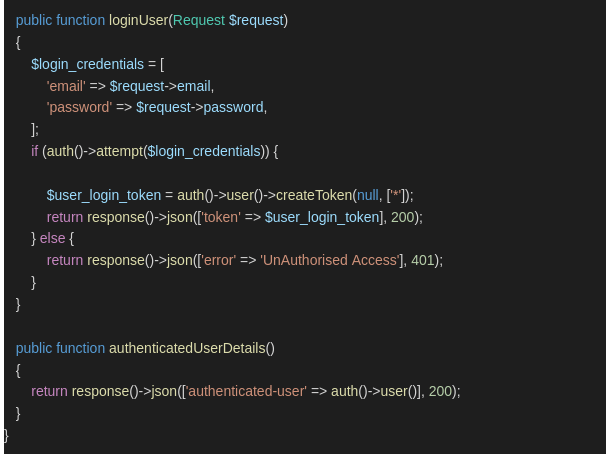
Step 4: Creating the Authentication Controller
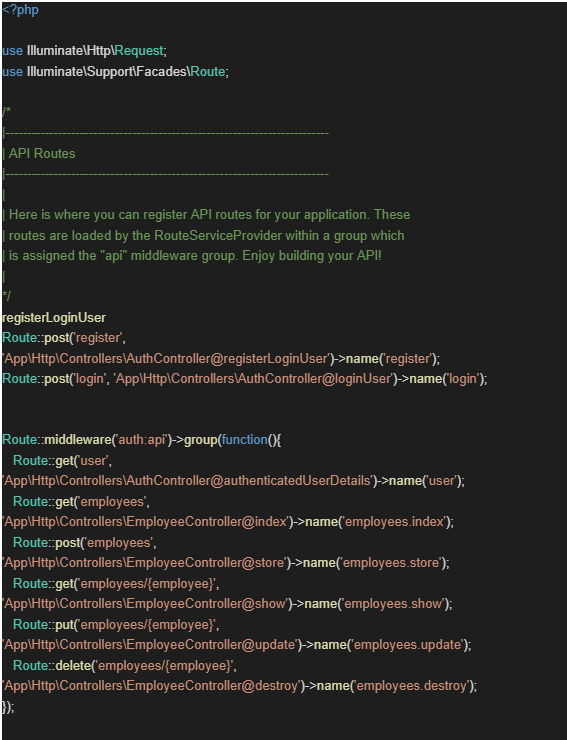
In the Authcontroller, create a registerLoginUser and loginUser method. We can register a user using the name, email, and password and log in using the email id and password:
To register a user and log the registered user, we have to create an AuthController. To Create AuthController, you need to run the below command.

Step 5: Create a CRUD API for Employees
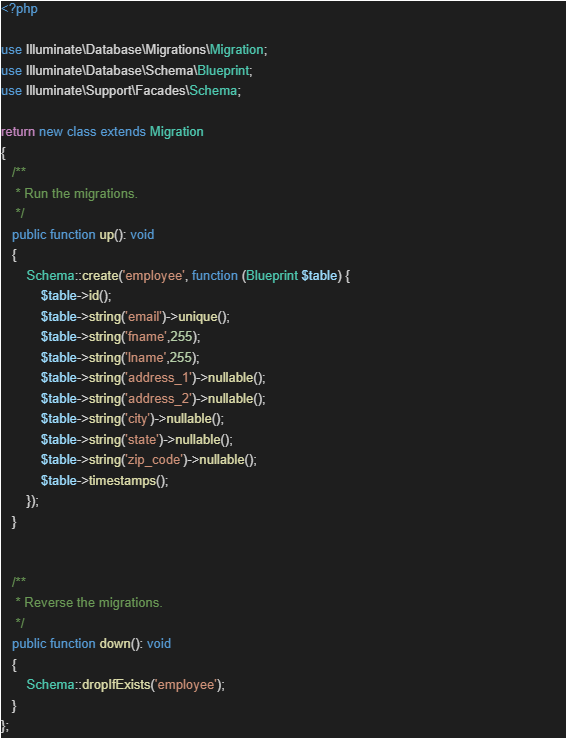
Create a migration file to create an employee table. To create an employer table, use the below command to create a migration file

After creating a migration file, you can check the created migration file inside the migration folder of the database folder.
Open the migration file and add the necessary fields in the migration file which you want to add to the employee table. I have added the necessary fields in the migration file, as shown below.
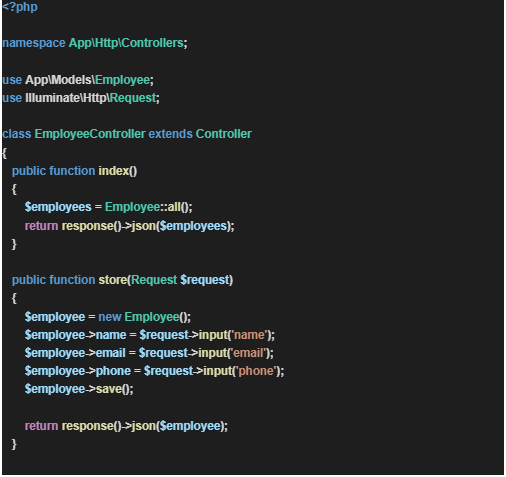
Then we will create a CRUD API for Employees. To do this, we must create a new controller and model in our Laravel project. You can do this by running the following commands:

Then we need to create an employee controller. To create an employee controller, we need to run the below command. Executing the above command will result in the creation of a new file in the specified location.
app/Http/Controllers/EmployeeController.php
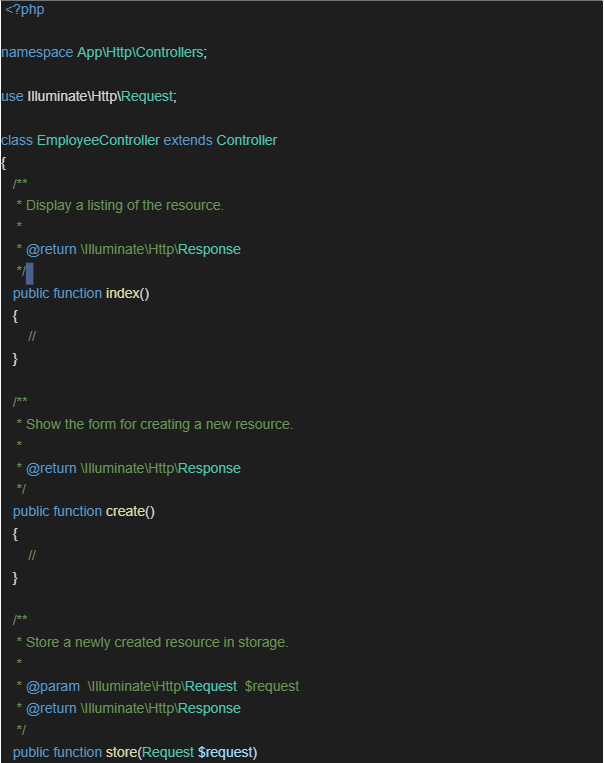
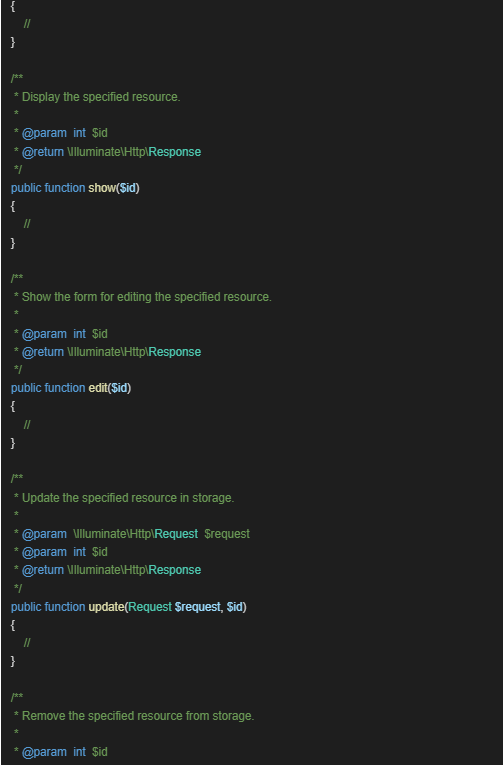
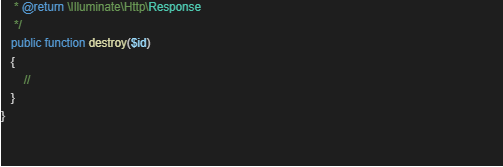
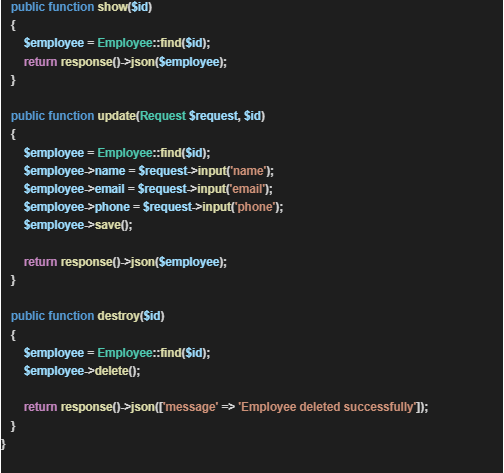
Step 6: Implement the CRUD API
Now that our controller and model are set up, we can implement the CRUD API. Here’s an example of how the controller should look:
Step 7: Creating the Authentication Routes
Next, we need to create the authentication routes for the API. In the routes/api.php file, add the following routes:
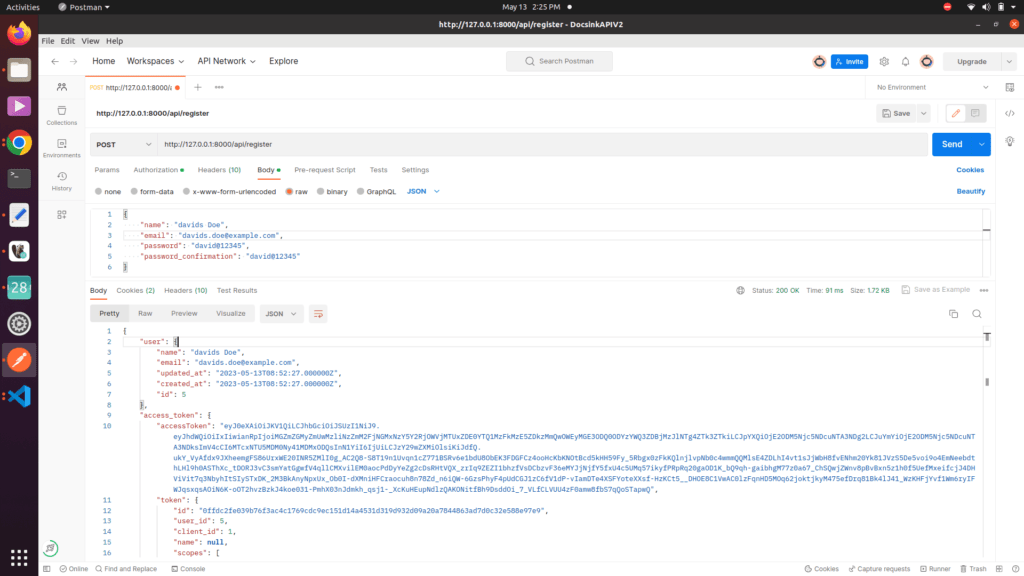
Step 8: Testing the API with Postman
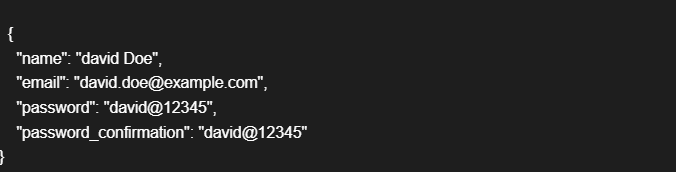
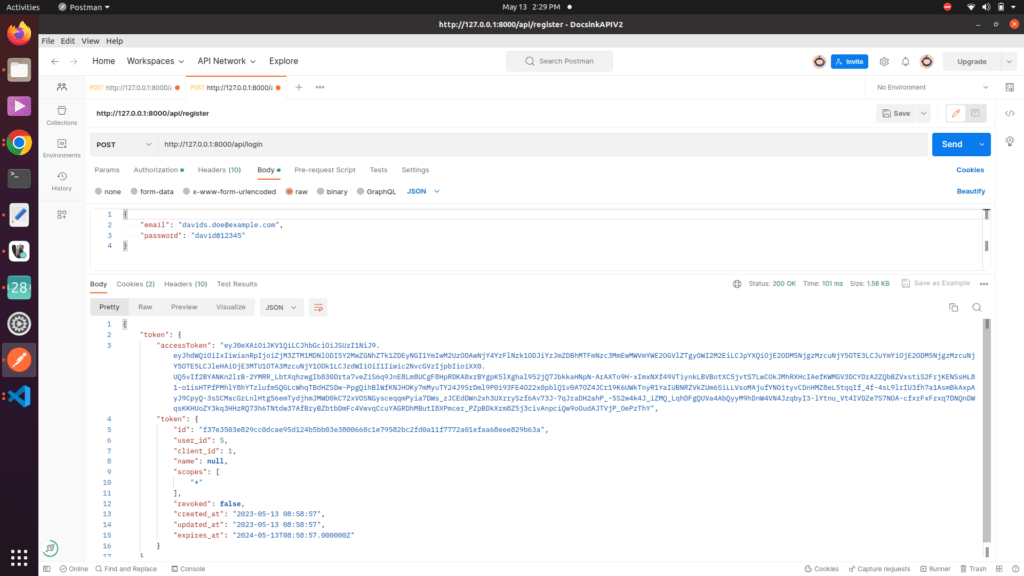
We can test the API using Postman. First, we need to register a new user by sending a POST request to the register endpoint:

In the request body, add the following JSON data:
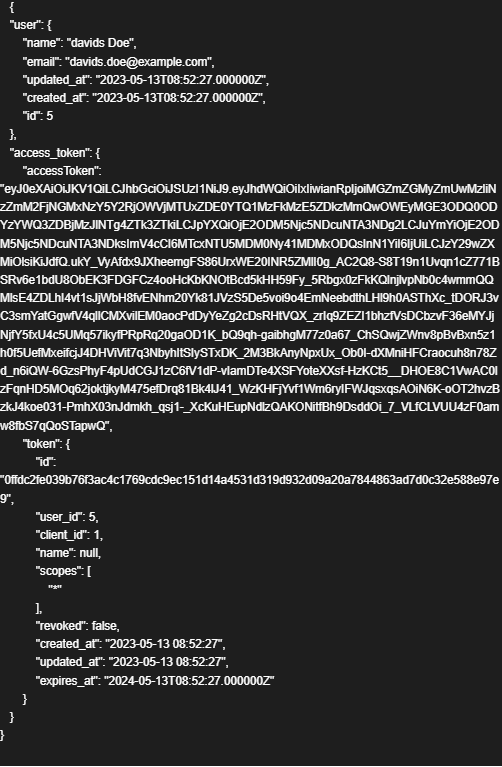
This will create a new user and return the user and access token in the response:
You can get the access token of a previously registered user using the login API

In the request body, add the following JSON data:

Copy the access token from the response.
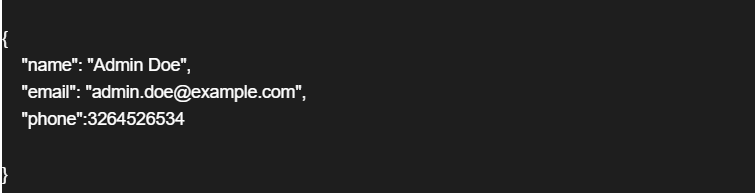
Next, we can test the employee’s API by sending requests to the employee’s endpoint:

In the request body, add the following JSON data:
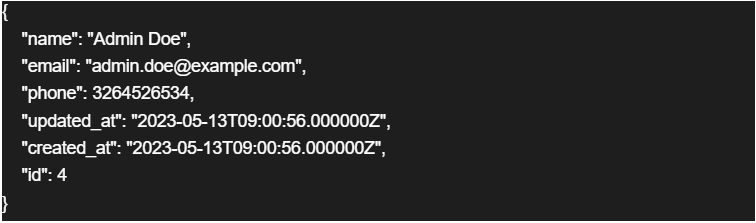
This will create the new employee with the above details. We will get the below result after submitting the request.
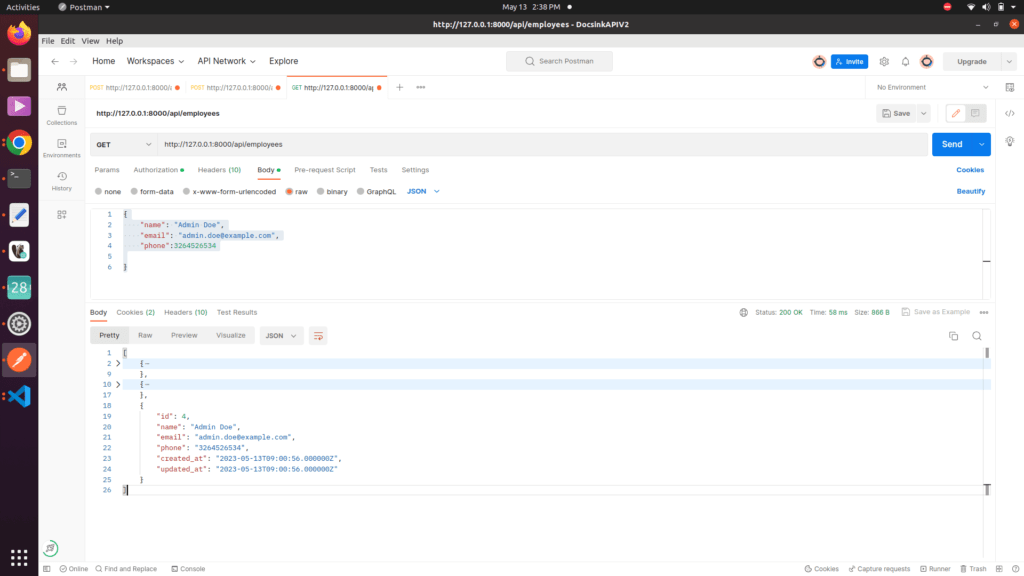
Next, we will get all the employees by calling the get API

This will create the new employee with the above details. We will get the below result after submitting the request.

To delete the employee, we need to pass the id the employee needs to delete.


Conclusion
In this blog, we have learned how to create the PHP laravel project and Authenticate the REST API with OAuth2.0. We have used the Laravel passport package for OAuth2.0, created the employee CRUD API, and protected those APIs with OAuth2.0. We have used Postman to test those APIs and learned how to register the new user, acquire an access token and utilize the access token to access the protected employee endpoints.
Unleash the power of PHP development with our team of skilled developers available for hire. Take your projects to new heights by leveraging the expertise of our PHP developers through our flexible trial period. Hire PHP developers today.


