Using Flask to Build RESTful APIs with Python
Flask is one of the most popular frameworks in Python. It is mainly used to build small size to medium size applications. One of the best aspects of Flask is that it is a bare minimum framework that one can customize as per their need.
Flask has also gained much popularity in the Data Science community. Data Scientists can quickly create and deploy APIs for the models in production. Along with backend API, we can render frontend, as Flask leverages Jinja2 to render HTML templates.
Flask is a good option if one has to build a microservice-based architecture. This means we can build small self-contained services which can later be easily integrated into another extensive application. For example, an application is built in NodeJS and serves the need quite nicely. Still, a few machine learning-based features are to be added to the application, for which we can create separate services for each ML model and integrate the API in the NodeJ application.
Many popular applications are built using Flask. Netflix and Uber are some popular applications that use Flask as the backend.
Bootstrapping a Flask Application
Check the Python version: The first step is to check if you have Python installed on your system. You can do this using the below command and get the output in the following line.

If you don’t get this output, python is missing from your system. You can refer to the links to install Python for Windows. Mac and Linux-based systems usually come with pre-installed Python.
Check pip: Next, we check if pip is installed with the below command.

If pip is not present, you can install it using the below commands:
- Windows: py -m ensurepip –upgrade
- Linux: python -m ensurepip –upgrade
- MacOS: python -m ensurepip –upgrade
Flask Installation: Now that we have Python and pip ready, we can proceed to install Flask using the command
- pip install flask

To confirm if the installation was successful, use the following steps.
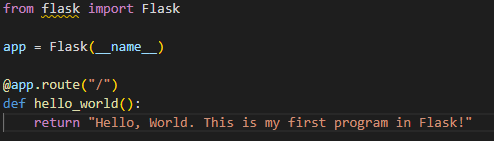
First Flask program: Let’s build our first Hello World Program using Flask. To do this, create a new file and name it hello.py. You can use the editor of your choice to write the below code.
Save the file, and in the same directory run
- flask –app hello run
The output would look like this.

On the browser of your choice, enter: Http://127.0.0.1:5000.

If you can see the above screen, congrats on your very first Flask program
Flask project:
Now that we know how to install Flask and introduce ourselves using Hello World. Let us take a step forward and create our first project using Flask. I guide you step by step into it.
- Create a directory: Create a new directory called “demo” on the location of your choice and navigate to the location.
- Create a requirements file: In the demo directory, create a new file called requirements.txt. This file will contain the list of packages required to run this project. We will add “flask” to the file to keep it simple.

As we progress, if needed, we will keep adding package names to this file.
- Create an app file: Next, we create an app.py file containing all the program’s logic.
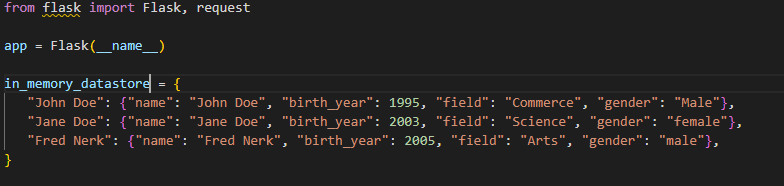
- Now let us import the flask module along with the request and add some static data to perform operations.
- Now let’s write the logic to get the list of students and add a student to the data.
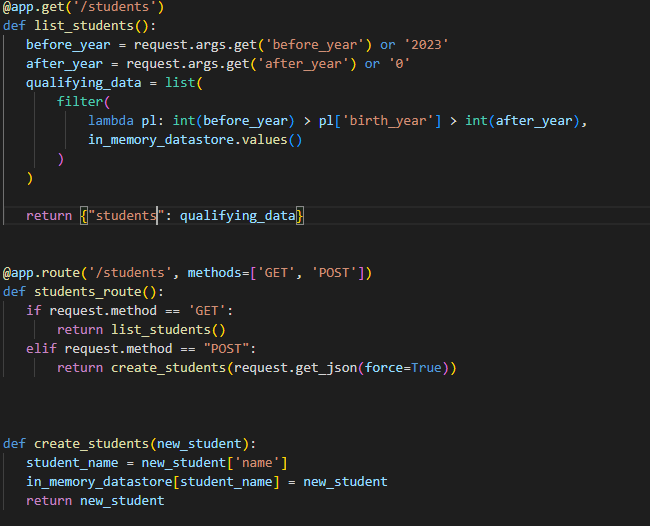
The first function returns the list of students born after and before a specific year. If no dates are passed, we take default values specified in the code.
Now that we have a function defined, we need an API route that will communicate with the code from any service with the data in flask @app.route is used to define the API route.
To run the code, we write “flask –app hello run –reload” in the command prompt so that we don’t have to restart the server whenever we make code changes.
Let’s try this API using Postman. Postman is a tool where one can test the APIs they have built. It can be installed using this link.
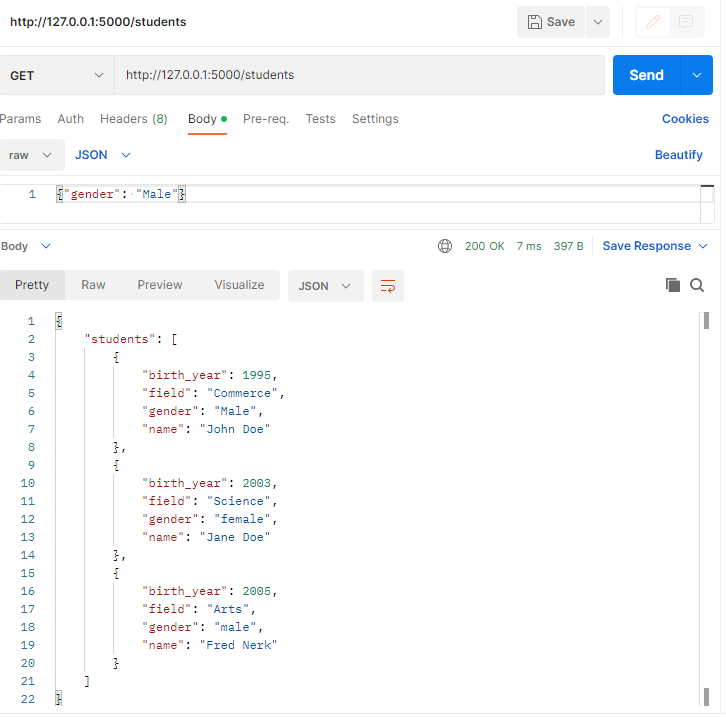
Here we see the endpoint returned all the details of the students
Let us create a new record named John Connor by using the POST method.
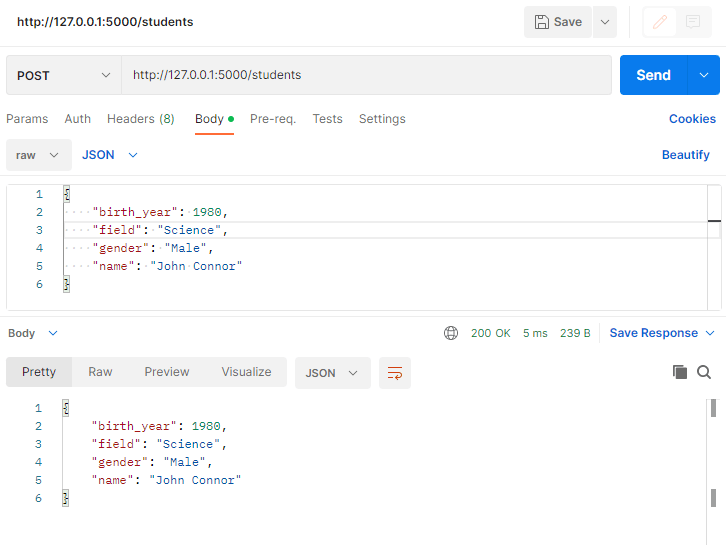
We again hit the get students API and checked the results to see if the new student was added.
We can see that a new student was added to our dataset.
- Next, we update student details in the data. To do this, we need another set of routes and functions. Let us see how it looks.
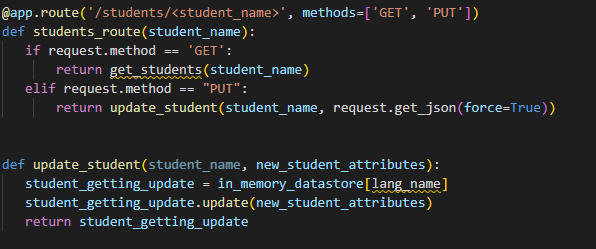
The PUT method updates the details of the student.
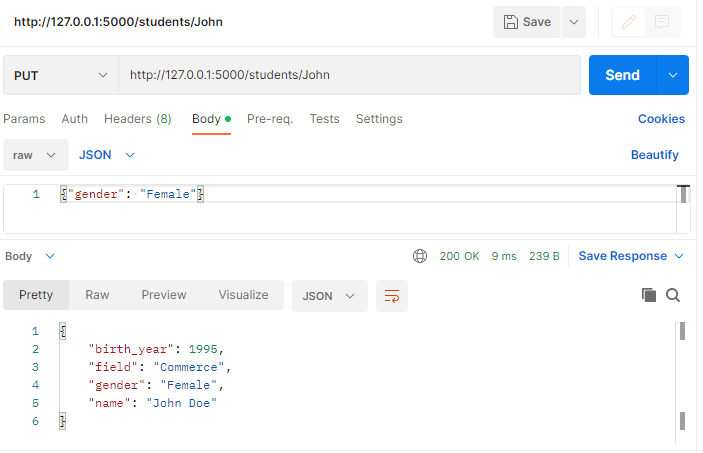
As we can see that we could successfully update John’s gender by using the PUT method
- Until now, we have seen how to list all the students Using the GET method; we used the POST method to create a new record and the PUT method to update the details. What if we have to delete any one record? There is a DELETE method for that. First, we write the code for the delete method.
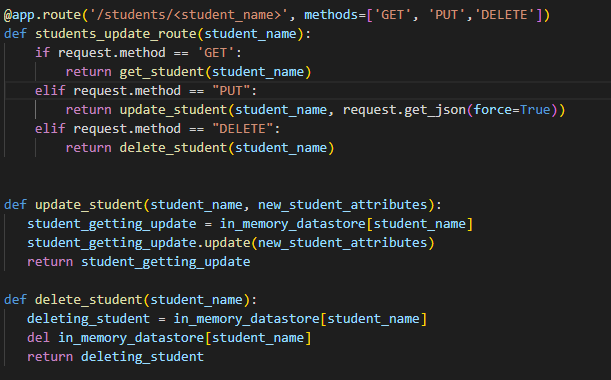
Notice that in the route, we have added DELETE in the methods list and defined the function to delete the student.
Now let’s delete the student called Fred.
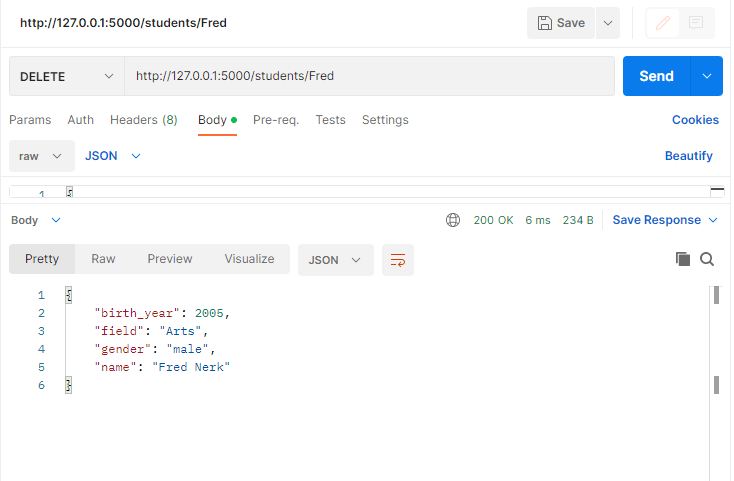
To check if the student was deleted, we again hit the GET students API to see the results.

We can see that a Student named Fred has been deleted from our dataset.
Conclusion
We were successful in creating a sample Flask application. It had GET, POST, PUT, and DELETE methods. We completed this project in less than 70 lines of code. That is a quick and short time to demonstrate the capability. Syntax of Python is easy, and we can quickly produce with fewer lines. These were just basics; we can always add authentication to secure the APIs. We also saw how to test the endpoints using Postman.
Thinkitive provides top-notch Python development services and gives you the opportunity to hire vetted Python developers with a free trial. Take your business to new heights with Python Development – hire Python developers now!


