What is Kubernetes?
Definition:
Kubernetes (also known as k8s or “Kube”) is an open-source containerized applications management platform that helps DevOps automate many manual processes such as deploying, managing, and scaling containerized applications.
In layman’s terms:
Kubernetes is a system that manages containers (containerized applications) where a container is a built image of an application that holds all the necessary things to run that application(like platform info., dependencies, libraries, environment variables, etc.) Building a complete application requires many services and so do the containers. Managing those containers is a hectic and time-consuming job for a human. To minimize the efforts and time required, Kubernetes comes into play.
Why Kubernetes?
Containerized applications deployed in K8s start up faster than the virtual machines we deploy. Kubernetes is 53% faster in deploying applications than other tools, which significantly impacts the life of DevOps.
It also makes scaling an application easier because of less time consumption.
The auto-scaling capability of Kubernetes is a huge advantage as new business requirements need something which can auto-scale up and down on its own to save the cost required to run applications.
Great!
Let’s first understand the components of K8s:
Control plane: The collection of processes that control Kubernetes nodes. It is responsible for task assignments in the K8s cluster.
Nodes: A node is a machine that performs the task requested by the control plane, which includes deploying pods, assigning resources, etc. A node can hold one or more pods.
Pod: A pod is a group of one or more containers that are deployed on some node on the K8s cluster. All containers in one pod share an IP address, IPC, hostname and resources. Moving Pods through the cluster is easy because they abstract network and storage from the underlying containers.
Replication controller: This is responsible for creating copies of the pod and managing the number of replicated copies on the cluster.
Service: Services manage the incoming and outgoing from Pods. No matter where the Pod is on the cluster or if it is replaced, the service will always proxies the request to the right Pod.
Kubelet: This service runs on nodes and reads from container manifests. It manages the defined containers and their state, ensuring they are started and running.
kubectl: It is a command line configuration tool for K8s. With the help of kubectl we can get all the information about the K8s cluster and deploy it onto the cluster with simple commands.
Hmm….. But how should it be done?
Let’s look at the basic overview of what we are gonna cover in this Chapter
Let’s Start by creating a docker image –
Prerequisite:
- Backend Code in running state
- Docker installed on the local machine
- ECR registry
- Kubectl installed on the local machine
Create a “Dockerfile” without any extension in the root folder of your project
In the above code, we have exposed Port 3000. It is the port on which our application is going to listen. And the last line holds the command to run your application.
To create an image, use the following command-
docker build -t image_name.
Now the image is ready and we have to push this image to our ECR repository-
To access our AWS account on the local terminal, we have to configure it first. To configure, use the following commands-
AWS configure
AWS iam get-user
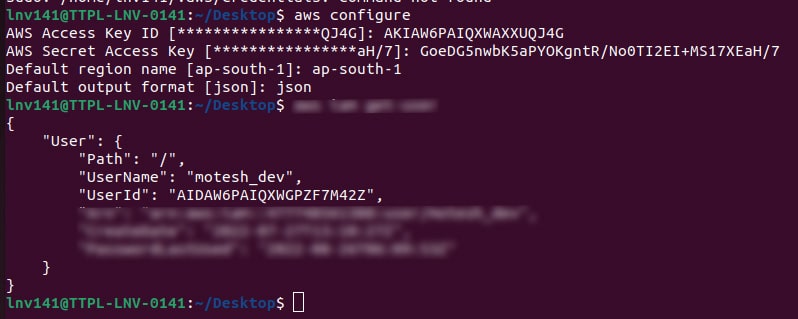
After the first command, provide AWS credentials and output format as “JSON.” The second command will show you the user you just have configured.
AWS ecr get-login-password –region ap-south-1 | sudo docker login –username AWS –password-stdin <URI_of_ECR>
Now we have connected our docker to ECR
Let’s tag the image to our ecr repository and push it
docker tag <docker_imageID> <URI_of_ECR>/<repository>
docker push <URI_of_ECR>/<repository>:latest
The next step is to create an EKS cluster-
But first, we have to set the IAM role for our nodes
Note: set up everything and test properly before you create an EKS cluster. AWS will charge $0.10 per hour for EKS.
Let’s create a role for the master node. The master node will be created and managed by AWS itself; we just have to provide specific permissions to it so that it can do all the required stuff.
Open IAM in the AWS console and Create a new role with the following permissions:
AmazonEKSClusterPolicy
AmazonEKS_CNI_Policy
AmazonEKSVPCResourceController
Let’s name it master_node_role
It’s time to create another role for worker nodes. The worker node will be managed by us, or we can say the YAML file we will write for K8s.
Create a new role with the following permissions:
AmazonEKSClusterPolicy
AmazonEKSWorkerNodePolicy
AmazonEC2ContainerRegistryReadOnly
AmazonEKS_CNI_Policy
Let’s name it worker_node_role
In the root folder of your project, create a yaml file for K8s cluster deployment and let’s call it deployment.yaml. This yaml file will hold the information about your pod’s specifications and also about services that will connect them to the internet and each other-
Now we are ready to create our EKS cluster.
Go to EKS on the Amazon AWS console and choose to create the role. Follow the below steps-
- provide a name for your cluster
- choose the Kubernetes version. I’ll recommend using 2 versions older than the latest
- choose cluster service role which we have created for the master node
- Hit next
- select vpc and subnets. It must have 2 IPs or simply select the default
- select security group which will have inbound and outbound as per your requirements
- set endpoint access to public
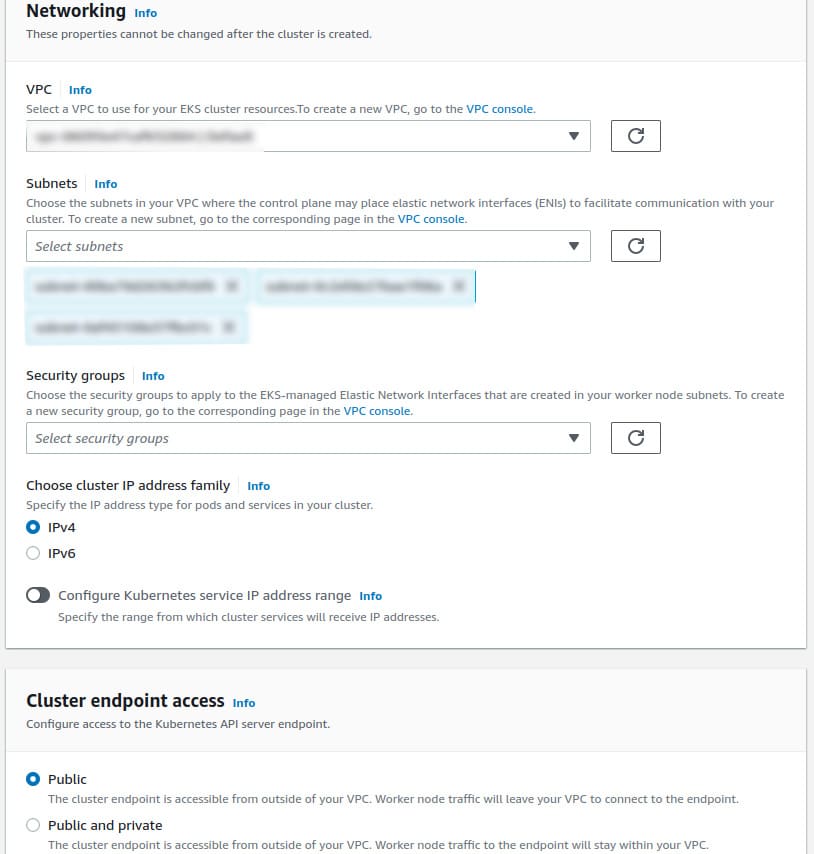
- Hit next
- on logging, page hit next and create a cluster
It will take around 10-15 mins to create a cluster.
Tick..Tock..Tick..Tock…!
Huh…. Created!
Let’s create worker nodes for our cluster-
- go to compute tab of the cluster and scroll down to node groups and add node group
- provide name
- select worker node role, which we have created
- let everything else be as it is.
- Hit next
- Keep AMI type and capacity as it is
- select the instance type as per requirement (for practice, use t3.micro)
- provide disk size as per requirement (for practice, 10 GB is sufficient)
- leave node group scaling and update the configuration as the default
- Hit next
- select subnets or let them as default and hit create
It will take around 10-15 mins to create a worker node.
Tick..Tock..Tick..Tock…!
Huh… it’s ready! Let’s deploy our containers.
Now we have to configure our EKS i our local terminal-
AWS eks update-kubeconfig –region <aws_region> –name <name_of_cluster>
Now hit the following commands to deploy pods-
kubectl create -f deployment.yaml
It will deploy our pods and services on EKS cluster with the specification we have provided
To check the deployment is going smooth, use the following commands-
kubectl get nodes –watch
kubectl get pods –watch
kubectl get services –watch
kubectl get all
— watch will show the live status of deployment as it is happening. to quit watching, use Ctrl+C.
Use the last command to get all info from our cluster.
Great!
Now we just have to expose our service and hit the APIs
To expose the service, hit the following command
kubectl expose deployment vet-deployment –type=LoadBalancer –name=vet-service
kubectl get service/vet-service | awk {‘print $1″ ” $2 ” ” $4 ” ” $5’} | column -t
Now use the cluster’s external IP and service port to hit APIs
We can test it using curl. E.g.-
xxxxxxxxx00000000000xxxxx.ap-south-1.elb.amazonaws.com:3000/my-details
Important Note: Don’t forget to delete node groups and clusters after use because AWS will cost per hour for clusters we create.
Conclusion
In this tutorial, we have seen Kubernetes and how it works. We created a docker file and container, uploaded them to ECR and created nodes and clusters for Kubernetes. Finally, we have deployed everything on K8s.
For any questions and inquiries, visit us at thinkitive


Your article helped me a lot, is there any more related content? Thanks!
Hi there to every body, it’s my first go to see of this webpage; this website includes amazing and really excellent information in support of visitors.