Mirth Connect and its application as HL7 Parser
What is HL7?
HL7 is a set of international standards used to transfer and share data between various healthcare providers. More specifically, HL7 helps bridge the gap between health IT applications and makes sharing healthcare data easier and more efficient when compared to older methods.
Why does healthcare need HL7?
Many healthcare providers, particularly specialists, are required to access multiple electronic systems to see relevant diagnoses for a patient. This can be even more challenging if they provide services in outpatient clinics that are not integrated with the local hospital system. This is where Fast Healthcare Interoperability Resources (FHIR) comes in and HL7 interoperability standards, such as the messaging format HLv2 or the most recent FHIR, exercise their value.
By providing a common language around content and structures for clinical data classes (e.g. diagnoses, allergies, procedures, …) data can be exchanged across EHRs without ambiguity and risk of misinterpretation.
Using Mirth Connect(NextGen Connect) for HL7
What is Mirth Connect?
Mirth Connect is a cross-platform interface engine used in the healthcare industry that enables the management of information using the bi-directional sending of many types of messages. The primary use of this interface engine is in healthcare.
Install Mirth on Ubuntu and Launch Mirth
- Install/Prerequisites:
| Install Open JDK | Java 8 + | |
| Install databases: | PostgreSQL 8.3+ MySQL 5.6+ Oracle 10gR2+ SQL Server 2005+ | Any of these |
| Download Mirth | Version 3.9.1 | Mirth-Connect-3.9-Download |
| Download Mirth Administrator Launcher | Latest | Administrator-Launcher-Download |
- Download Mirth Server: nextgen-mirth-connect-3-9
- Download Mirth Launcher: administrator-launcher
- Unzip both of the downloaded files.
- To start Mirth Server on a local system, run the following command on the terminal where Mirth Server is downloaded and unzipped.
java -jar mirth-server-launcher.jar- Launch: Go to the downloaded and unzipped Mirth Administrator Launcher location and run the following command on the terminal.
./launcher- Mirth Server will be up and Mirth Application will be launched by following the above steps.
Using Mirth Connect to Receive TCP messages.
Creating TCP (Server) on Mirth:
To create a channel on Mirth, follow the following steps:
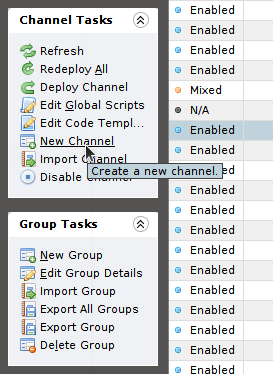
- Go to channel
- Click on ‘New Channel’ present at ‘Channel Task.’
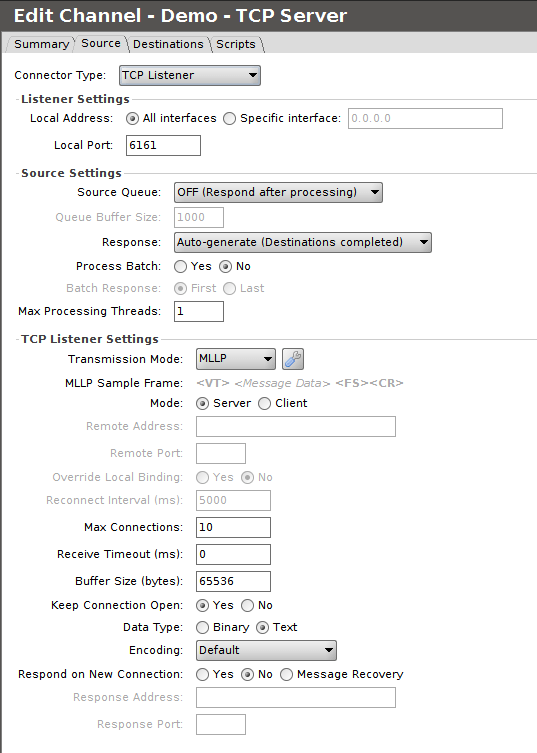
- Configure Source
- Select Connector Type as TCP Listener
- Add port number on which web service should listen to the connection
- Select Transmission Mode as ‘MLLP’ and Mode ‘Server’
- Configure Destination
- Go to the ‘Destination’ tab
- Select Connector Type: ‘Javascript Writer’
- Deploy Channel
- Save Changes at Channel Tasks and Deploy the channel.
Testing via sending a message to the channel
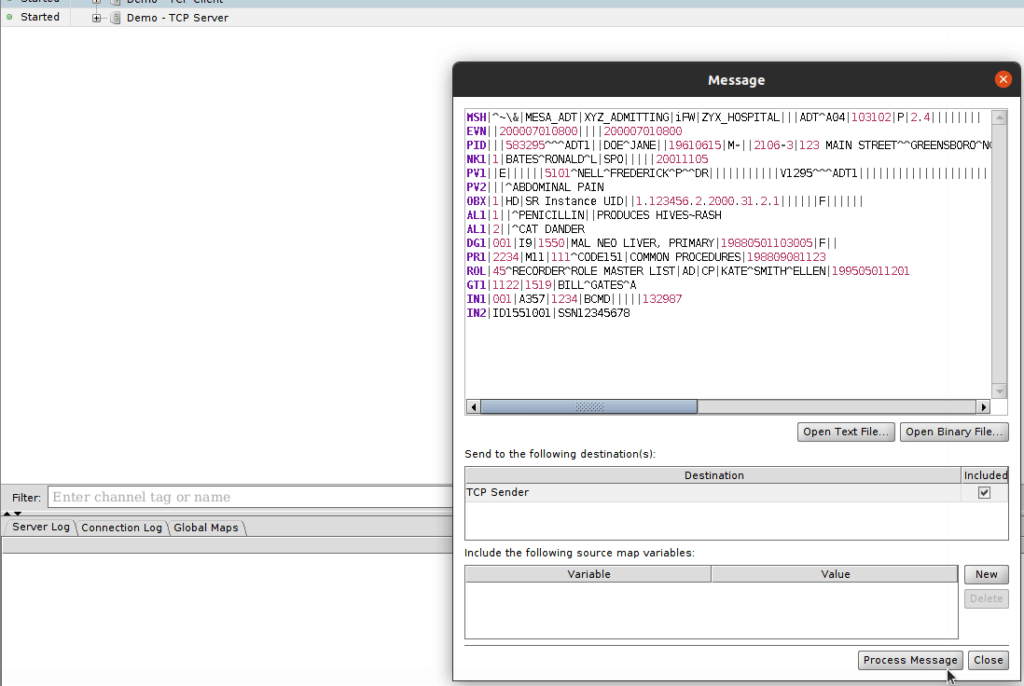
- Go to Dashboard and right-click on the channel
- Click on ‘Send Message. Paste sample HL7 message and Click ‘Process Message.’
Create TCP sender(Client) in Mirth (Alternate HL7 Soup for windows to test)
- Create a new channel
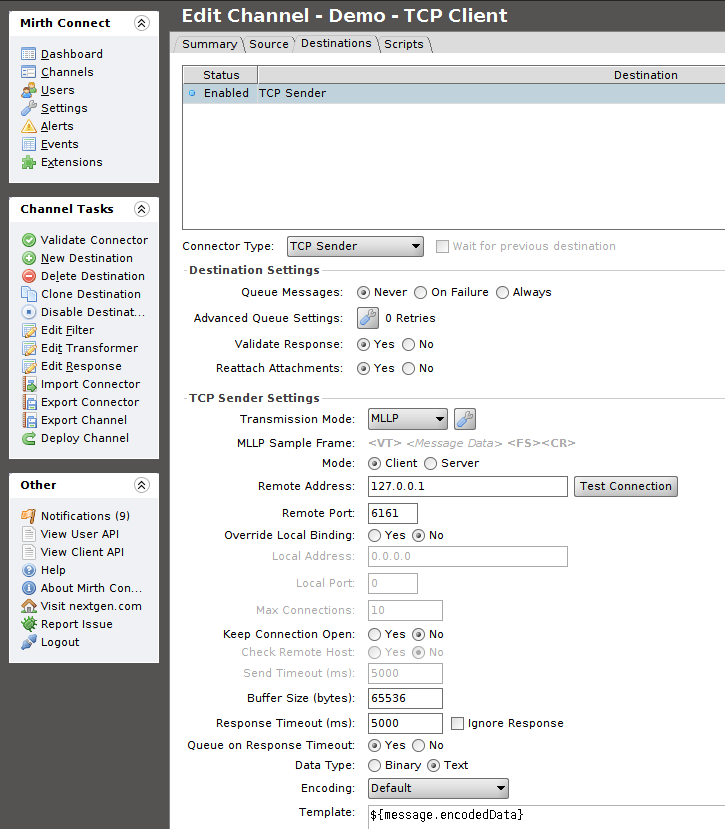
- Configure TCP Sender
- Go to Destination and select Connector Type as TCP Sender
- Select Transmission Mode as ‘MLLP’ and Mode ‘Client’
- Change remote address and remote port
- Save changes and deploy the channel.
Test: Client to Server
- Send Message from TCP Client
- Transform HL7 to JSON in Mirth.
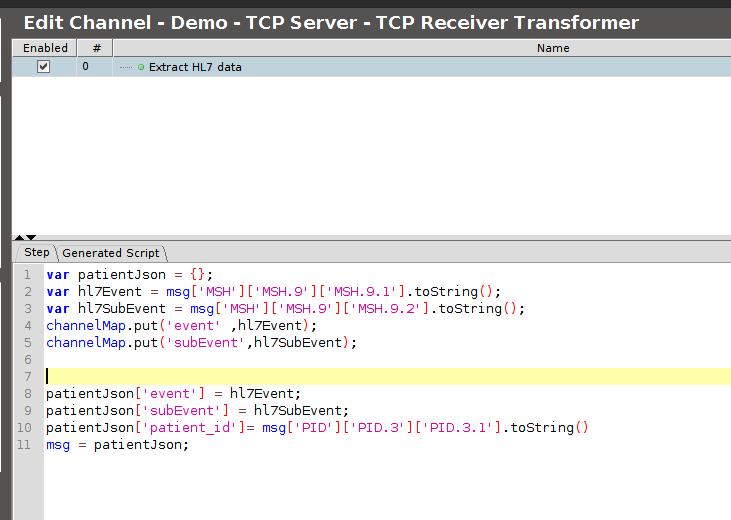
Let’s try to read the HL7 message received at Server
- Go to destination
- Click on ‘Edit Transformer’
- Add new step
- Change type to JavaScript
- Paste sample message to ‘Message Template.’
- Got to Message Tree
- Select data you want from the HL7 message, drag-drop and assign it to the variable.
- Create an object from this data as a JSON type.
- Log files raw message and transformed message.
Test :
- Go to dashboard and send a message from TCP Client
- Double click on the TCP server channel
- Select the latest connect message
- You can see HL7 messages received at raw messages and JSON at the transformed message.
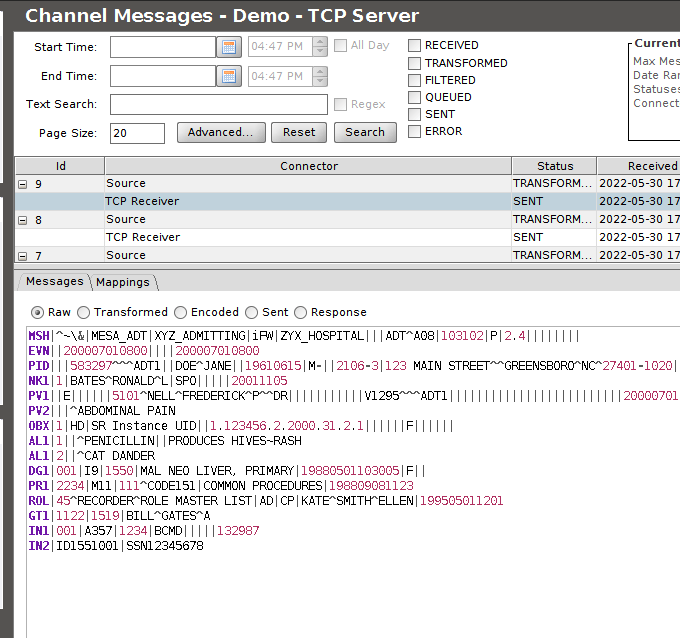
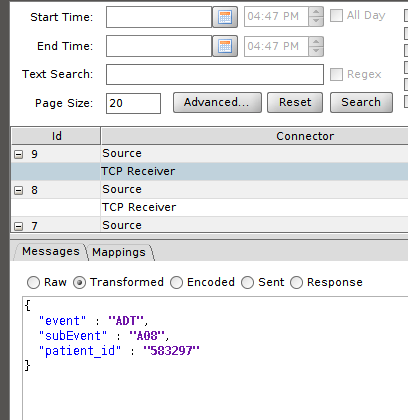
- Check logs at Dashboard Server Logs to check logged files raw messages and transformed messages.
For any questions and inquiries, visit us at thinkitive


