Create EC2 Instance and Deploy Nodejs Application
AWS:
Amazon Web Services (AWS) is a subsidiary of Amazon that provides on-demand cloud computing platforms and APIs to individuals, companies, and governments on a metered pay-as-you-go basis. In aggregate, these cloud computing web services provide a set of primitive abstract technical infrastructure and distributed computing building blocks and tools. One of these services is Amazon Elastic Compute Cloud (EC2), which allows users to have at their disposal a virtual cluster of computers, available all the time, through the Internet. AWS’s version of virtual computers emulates most of the attributes of a real computer, including hardware central processing units (CPUs) and graphics processing units (GPUs) for processing; local/RAM memory; hard-disk/SSD storage; a choice of operating systems; networking; and pre-loaded application software such as web servers, databases and customer relationship management (CRM).
What is Amazon EC2?
Amazon Elastic Compute Cloud (Amazon EC2) provides scalable computing capacity in the Amazon Web Services (AWS) cloud. Using Amazon EC2 eliminates your need to invest in hardware upfront, so you can develop and deploy applications faster. You can use Amazon EC2 to launch as many or as few virtual servers as you need, configure security and networking, and manage storage. Amazon EC2 enables you to scale up or down to handle changes in requirements or spikes in popularity, reducing your need to forecast traffic.
Create an AWS EC2 Ubuntu Instance:

To create a new EC2 instance.
Click > EC2 dashboard. Here, If no instances are running, Click > instances and select Launch Instances.
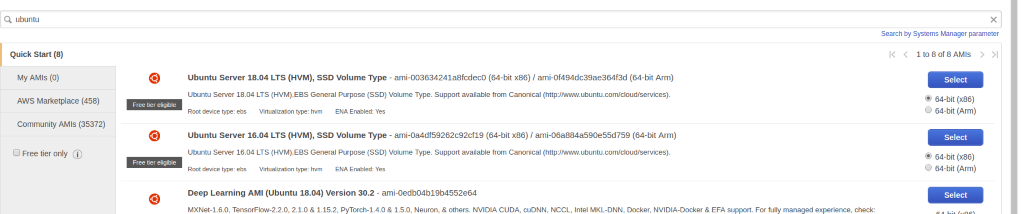
[ Step 1: Choose an Amazon Machine Image (Ami) ]
Search for Ubuntu in the search bar
Click > Ubuntu Server 18.04 LTS (HVM), SSD Volume Type, which is the latest Ami from Ubuntu
Select and use > 64-bit version.
[ Step 3: Configure Instance Details ]

The number of instances is 1, now using the default VPC and the default Subnet.
Click > Add Storage
[ Step 4: Add storage ]
In this step, you’ll see that the instance has been automatically provisioned with a general-purpose SSD root volume of 8GB. (The maximum volume size we can give to a General-Purpose volume is 16GB)
AWS provides 3 types of EBS volumes- Magnetic, general-purpose SSD, and Provisioned IOPS.

Click > Add Tags
[ Step 5: Add Tags ]
Name your instance. Adding the final domain is good practice.
Click > Configure Security Group
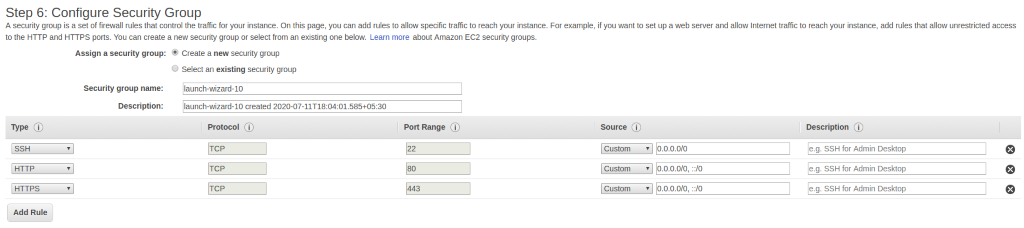
[ Step 6: Configure Security Group ]
This is an added firewall mechanism provided by AWS.
Usually, you have one security group. You can create one as per the requirement of the server.
You can define open ports and IPs
Click > Review and Launch
[ Step 7: Review and Launch ]
In this step, we can review our choices and parameters.
Click > Launch
After clicking on Launch, you will be asked to create a key pair to log in to your instance.
The select key if you already have one or create a new one.
Click > Launch Instances

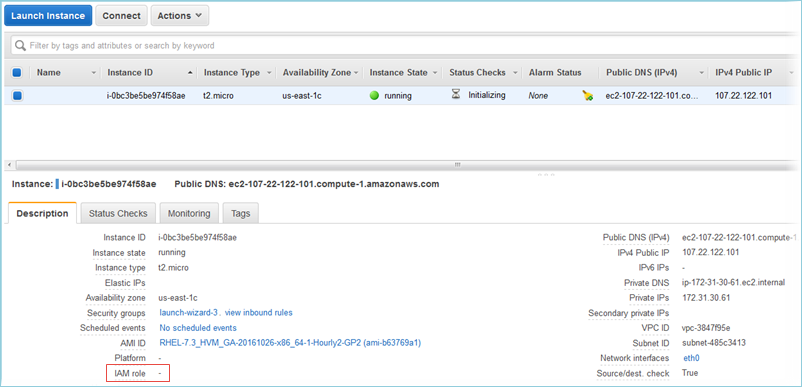
Our EC2 instance is created successfully, now SSH to Ubuntu EC2 instance and deploys NodeJS application.
Open terminal
ssh -i “path to Accesskey” ubuntu@”e2 ip”

For the first time, click yes for confirmation
[ Next Step: ]
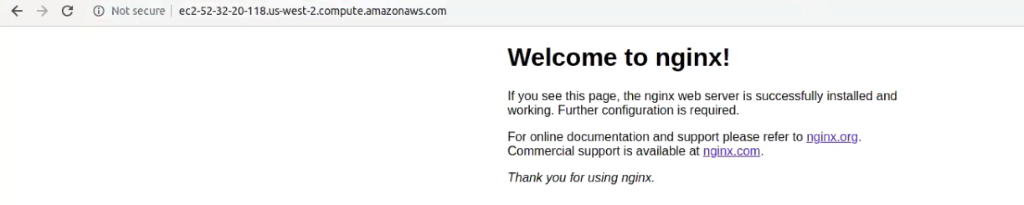
Installing Nginx
sudo apt install nginx

You can check status using
sudo systemctl status nginx
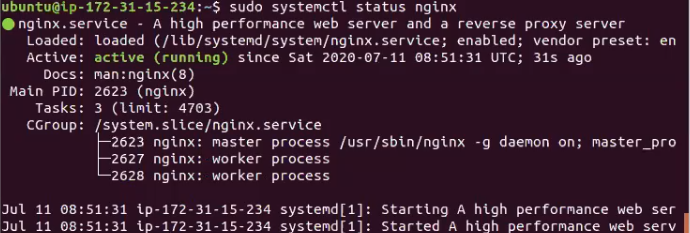
Hit the same IP in the browser to check
[ Next Step: ]
Installing Nodejs
Now we will install nodejs into the server
sudo apt install nodejs

Installing Npm
sudo apt install npm

[ Next Step: ]
Installing MongoDB
sudo apt install –y MongoDB

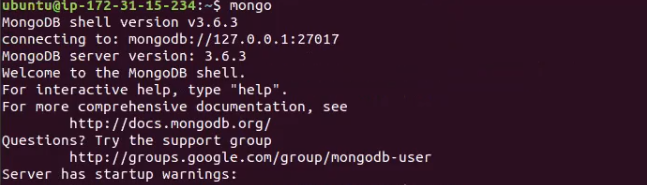
Type mongo to check MongoDB is installed successfully
[ Next Step: ]
Check-in All source code into the server
After we are done with all prerequisites.
Now we’ll clone code from the git repo
Copy HTTPS link of the repository from git/AWS code commit and clone your code
git clone “HTTPS link here.”

Enter username and password
[ Next Step: ]
Installing dependencies
Go into the code directory and install dependencies
npm install
[ Next Step: ]
Installing PM2
npm install pm2 -g

Start PM2
pm2 start server.js

Now we need to use Nginx to serve our application on another port
sudo nano /etc/nginx/sites-available/default
In location
Comment try_files by adding # in front of that line
Add proxy_pass http://localhost: port no here”; to next line
sudo nginx –t to check nginx configuration

Test success will be displayed for a successful configuration.
Now restart the server once using
sudo systemctl restart nginx

Every request to root will be redirected now
That’s it, your server is ready to serve requests for you! 🙂
For any questions and inquiries related to web development or if you’re looking to hire Node.js developers, we invite you to visit us at Thinkitive.


This article opened my eyes, I can feel your mood, your thoughts, it seems very wonderful. I hope to see more articles like this. thanks for sharing.